Quickstart
Get Ranger Feature Review running in your project in about 5 minutes. By the end, your AI coding agent will be able to verify UI features in a real browser.
Prerequisites
Section titled “Prerequisites”- Node.js 18 or later
- Claude Code (or your favorite AI coding agent)
- A web application running locally (e.g., on
localhost:3000)
Install & Setup
Section titled “Install & Setup”From your project’s root directory (it should be a git repo):
curl -LsSf https://cli.ranger.net/install.sh | shThis installs the CLI and walks you through interactive setup. If you prefer to install manually:
npm install -g @ranger-testing/ranger-cliranger setupThis walks you through the full setup interactively. Here’s what each step does:
Authentication
Section titled “Authentication”Ranger opens your browser to log in. Authorize the CLI, and it stores your credentials securely.
If you’re setting up in CI, pass a token directly:
ranger setup [token]. You can get one from your Ranger Dashboard.
Chromium Browser
Section titled “Chromium Browser”Ranger uses Playwright’s Chromium to run browser verifications. We require a specific version. If that version isn’t available, you’ll see:
The required version of the Playwright Chromium browser is not installed. Install it now? (Y/n)Say yes. This is the browser that verification agents use to test your app.
Claude Code Plugin
Section titled “Claude Code Plugin”The plugin connects Ranger to Claude’s workflow so it can use the Ranger CLI intuitively.
Where should the plugin be installed? > User (available in all your projects) Project (shared with team via git)Choose User if you’re trying Ranger out individually. Choose Project to share the plugin config with your team via git (requires a .claude/ directory).
Skills
Section titled “Skills”Skills teach your AI coding agent how to use Ranger.
Would you like to install skills? (Y/n)Say yes. Skills are markdown files that get installed into your .claude/skills/ directory. They tell Claude when and how to create feature reviews, run verifications, and address feedback.
Profile
Section titled “Profile”Ranger needs to know how to access your locally running app and how to authenticate. We manage that information in profiles.
What is the URL of your running app? (http://localhost:3000)Enter the URL where your app runs locally. Ranger checks that it’s reachable, then opens Chromium so you can log in to your app (if it requires authentication). Close the browser when you’re done. Ranger saves the session cookies so the verification agent can authenticate the same way.
Your app needs to be running at this endpoint when you add the profile. If it’s not, you can run ranger profile add local when you’re ready to set it up.
If your app doesn’t require login, you can close the browser immediately.
Use Ranger
Section titled “Use Ranger”Once setup is complete, open Claude Code in your project.
Enable Ranger
Section titled “Enable Ranger”At the start of your session, run the slash command:
/ranger:enableThis activates Ranger’s hooks for the session. Ranger stays enabled on your branch across sessions, so you only need to enable once per branch. (On main/master, hooks enable for the current session only, since those branches are shared.)
Build a Feature
Section titled “Build a Feature”Ask Claude to build something that involves UI. For example:
“Add a dark mode toggle to the settings page.”
With Ranger enabled, Claude will:
- Create a feature review with scenarios describing what to verify (e.g., “User opens settings, clicks dark mode toggle, page switches to dark theme”)
- Write the code (Ranger has nothing to do with this step and never reads or stores any of your code!)
- Run browser verification via
ranger go. A browser agent tests the feature review scenarios in your running app. - If verification finds issues, Claude fixes them and re-verifies automatically.
- Once everything passes, Claude shares a link to the feature review page.
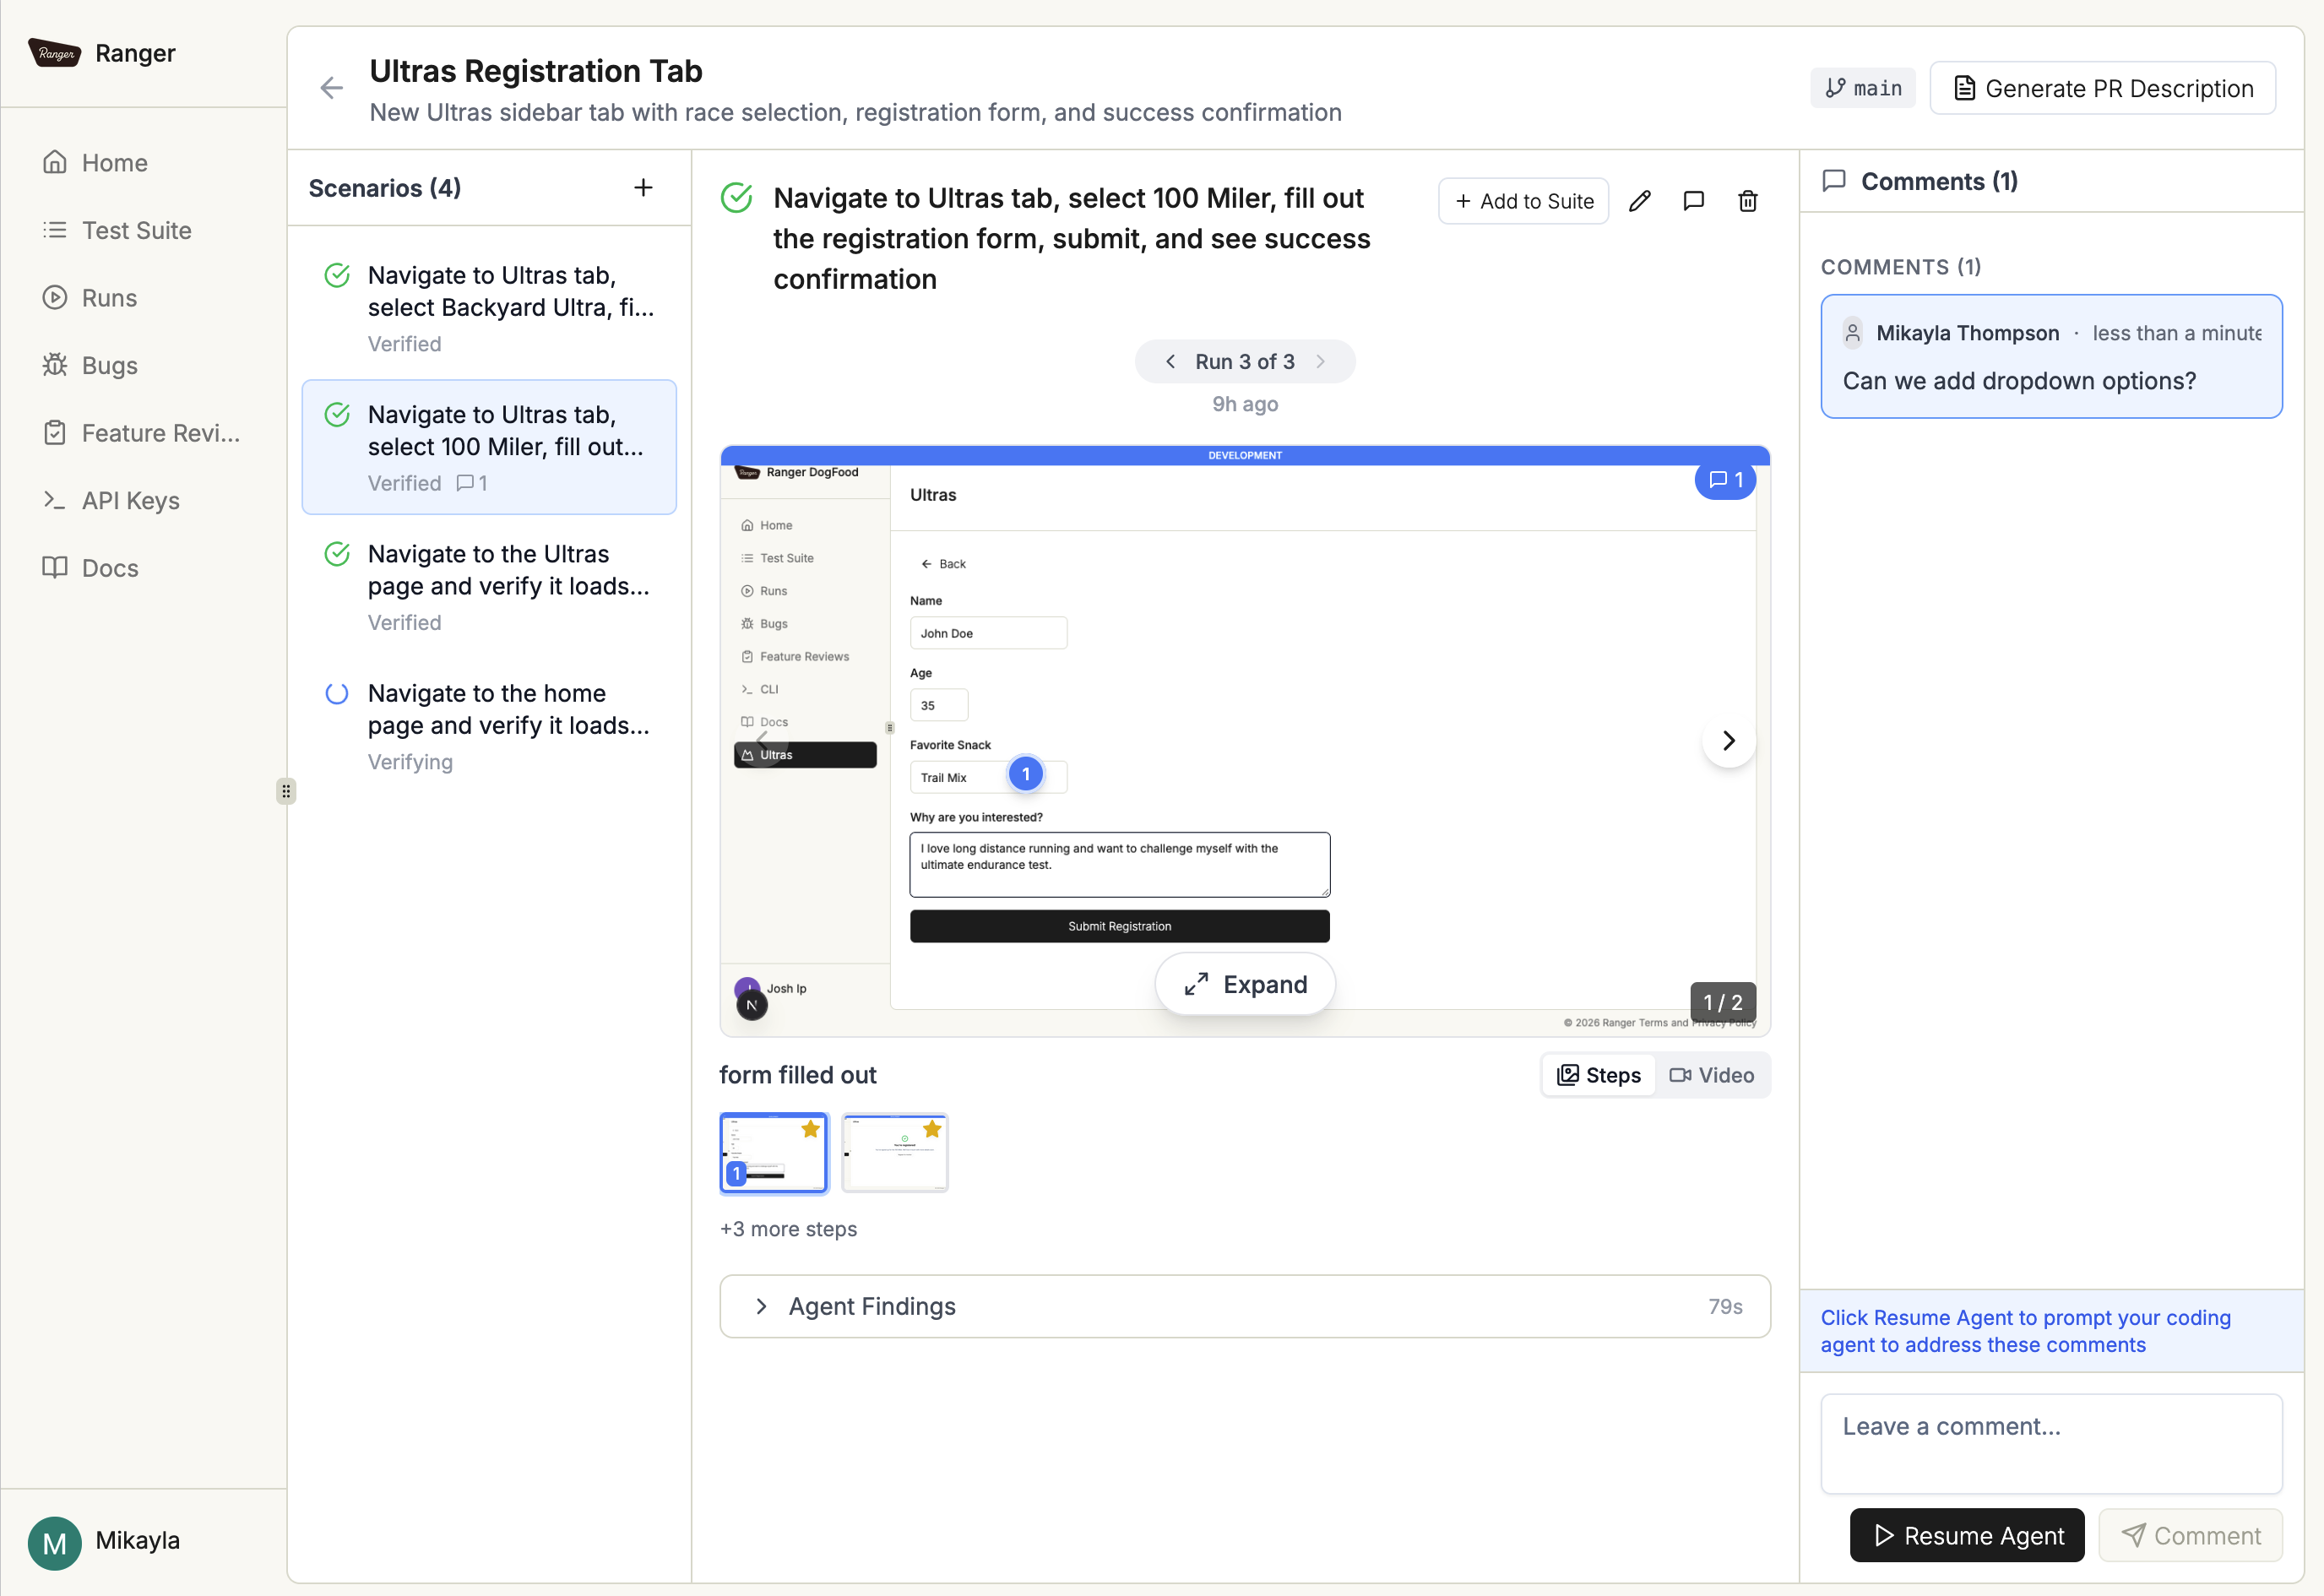
Review the Feature Review
Section titled “Review the Feature Review”Open the feature review link. You’ll see:
- A list of the scenarios verified (which could be marked verified, blocked, or partially verified)
- Screenshots and video from the browser verification for each scenario
- A comments section where you can leave feedback, including on a specific point in the screenshot
If you leave feedback in the screenshot, your coding agent will see and incorporate that feedback when you run /ranger:resume in Claude Code.
What’s Next
Section titled “What’s Next”- Profiles define where to test and how to access it.
- Scenarios are the user flows to guide the verification agent.
- CLI Overview gives you (or your agent) extra info about all the available commands.